
The fact that I have a whole tool cabinet drawer (and then some) dedicated to specialist tools for removing small cartridge bearings (aka, sealed bearings or deep-groove ball bearings) tells that I think about the task of bearing replacement more than I should.
At the root of my fascination with this topic is the simple fact that many major brands in the industry have continuously proven that bearing installation is considered (and is often relatively easy), but rarely is such consideration given to the eventual removal of those same bearings once worn (especially concerning rear suspension pivot bearings). The result is an expensive category of tools with no silver bullet solution; often, problem-solving is the best tool of all. Without a doubt, this confusion is the reason why I’m asked about this topic of tools more than any other.
In this edition of Threaded, I’ll take you for a stroll through my mind of cartridge-bearing removal, including common problems, why I try to avoid using simple pin punches, and what my preferred bearing removal tools are. Indeed, this is an almost never-ending category of great expense (even for professionals with access to trade prices), so please consider this a story of general interest and professional insight rather than an exhaustive DIYer guide.
I’ve limited my focus here to common bearing removal situations and the methods I’ve found best to overcome them. However, almost every bike or bearing-equipped component will have nuance in servicing, so there are countless scenarios where the advice, techniques, and required tools will vary. Always consult with the manufacturer if you're unsure, and in many cases, this may be one of those occasional repairs best left to a professional. This is part one of what’s sure to be a multi-part series in working with cartridge bearings. In future, I’ll cover how to measure for replacement bearings and of course, installation.
March 2026: A new comparison test of expanding-type bearing pullers has now been published.
Keeping it square
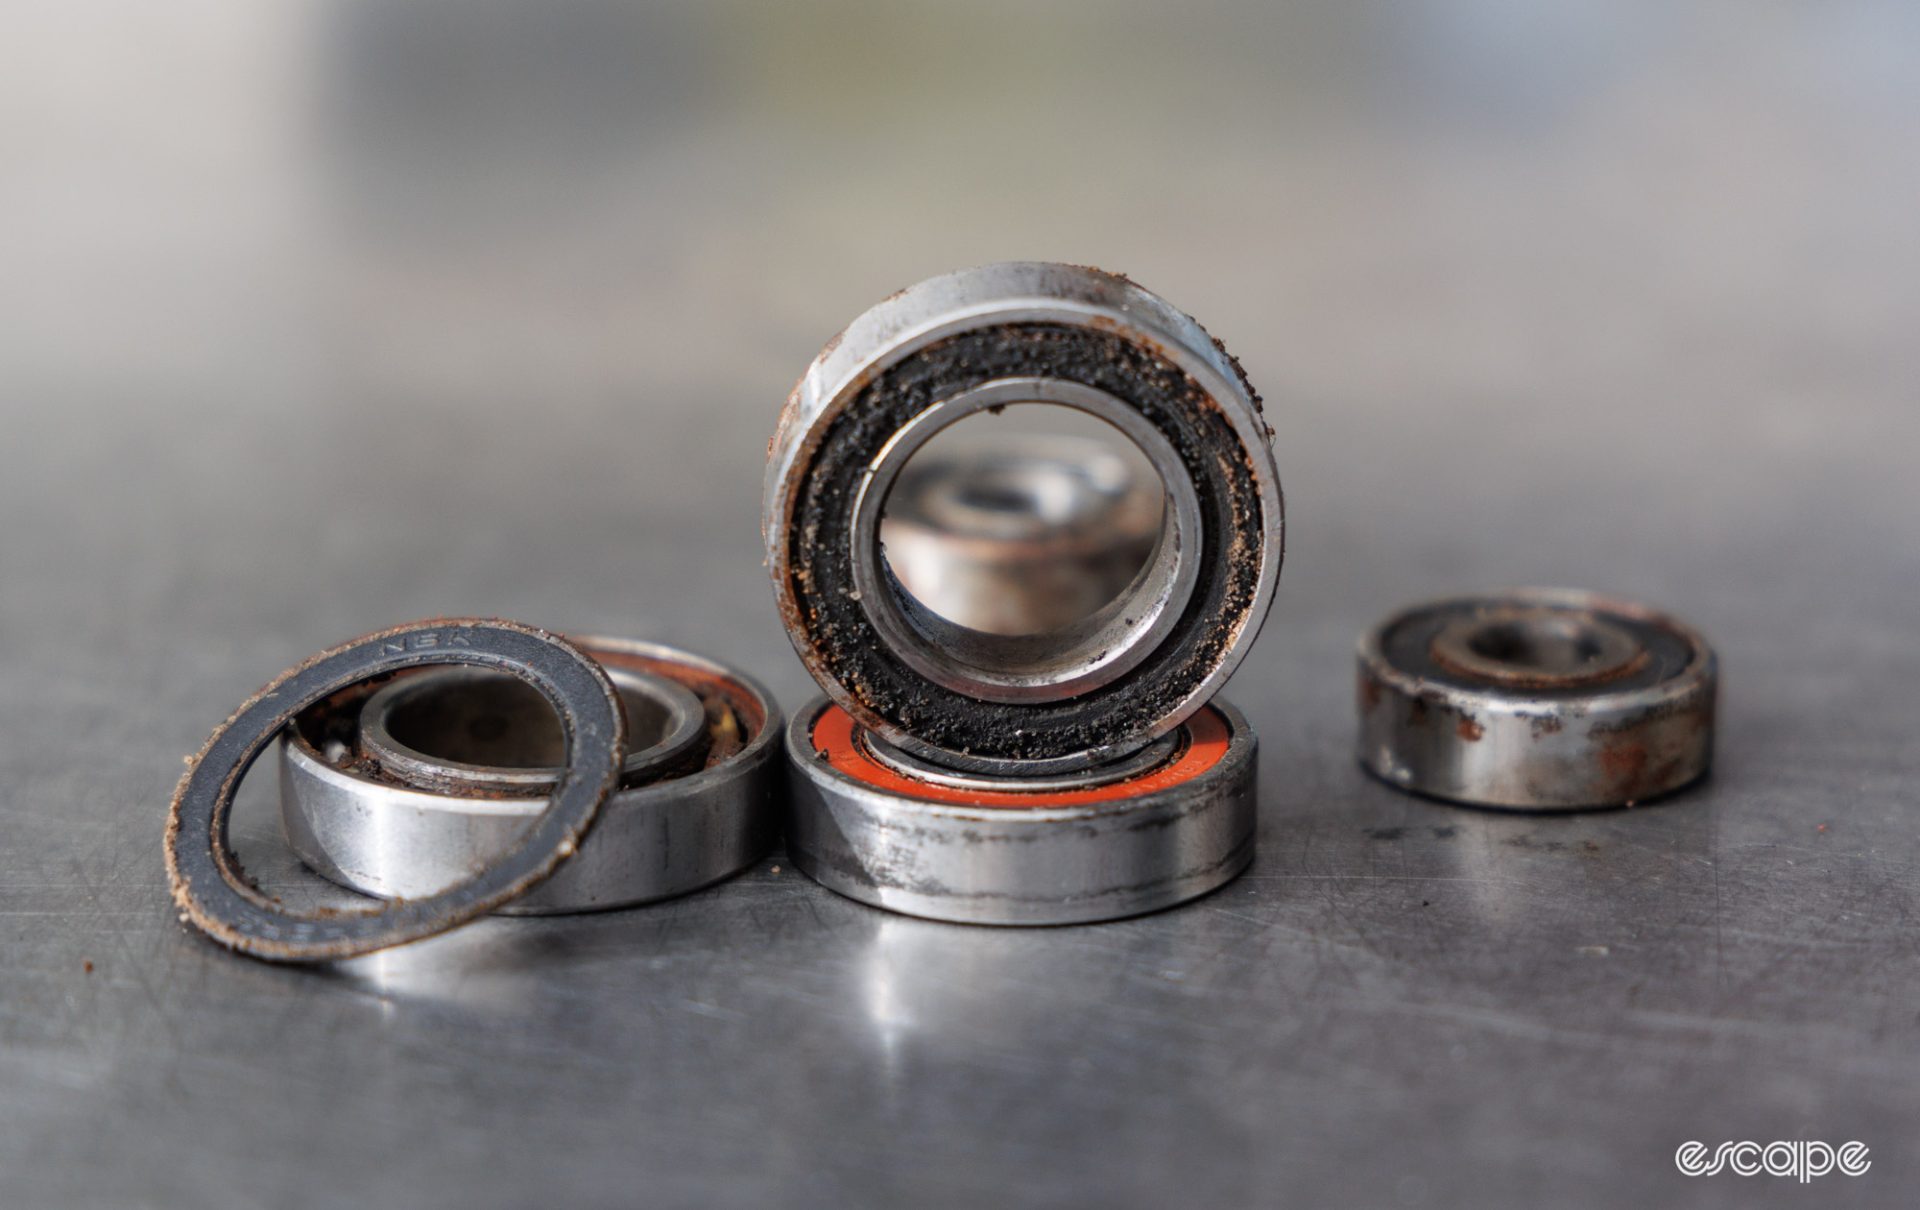
Cartridge bearings have become ubiquitous on modern bicycles. Made to be a self-contained and replaceable bearing unit, cartridge bearings consist of an inner race, an outer race, the ball bearings, and in most cases, there’s also a retainer for the ball bearings and protective seals. While some component and frame designs do a good job of protecting these bearings from the elements and unwanted load demands, others will encourage premature failure, which will require replacement.

Things quickly get complicated in the sheer number of bearing sizes used across a bicycle, many of which are non-standardised. It’s common for a single rear hub to have two or even three different bearing sizes within it, a rear suspension linkage may use a different bearing size at every single pivot location, and of course, bottom brackets and headsets are no more standardised. Adding to that stress are the many ways bearings are used, and that some that are installed without considered design for replacement.
In most bicycle applications, the outer race creates the press-fit that keeps the cartridge bearing in place. The correct installation process is to press on the part of the bearing that is responsible for the press fit. However, this then means you’re often blocked from removing the bearing in the same way. Instead, you often only have access to pushing or pulling on the inner race for removal.
The common and most cost-effective approach to bearing removal is to use a hammer and a long parallel pin punch against the inner race to knock the bearing out. The correct technique requires patience as you tap on one area, move the punch to another part of the race approximately 90° away, tap, and repeat as you walk the bearing out of its retaining surface as square (perpendicular) as possible.

This presents two issues. Firstly, a punch forces only a small area of the bearing to move, and walking a bearing out unevenly can cause damage to the precise (and often soft aluminium) bearing seat. Secondly, by hitting only a segment of the inner race, you risk dislodging it from the bearing assembly, leaving the bigger problem of extracting just the remaining outer race that is often concealed by whatever it is pressed against. The more worn and/or corroded a bearing is, the more likely this second issue becomes.
Pin punches can work with good technique, sometimes they are unavoidable, and they’re a handy workshop item for various other tasks. When shopping for pin punches you want something with a few different diameters, long lengths for access into rear hubs, and with non-chamfered edges at the face.
That said, my preferred approach is to use specialist tools that push, knock, or pull the bearing out square. Keeping the bearing square is best for the bearing seat, it’s less likely to explode the bearing, and it requires less effort, too.

Pullers versus Hammers
Just a few years ago, it was standard practice to use a hammer whenever removing any bicycle bearing, and while that remains true for many, there are now a number of specialist tools that aim to do the job without brutality or risk of a missed strike. I still use hammers today, but if I can’t correctly (and safely) brace the corresponding component, I prefer even fancier bearing removal tools that often call for a bearing press or similar threaded rod.

Hammers can be in the form of your household claw hammer, a mallet, or something similar that requires you to swing them (a topic that deserves its own article). Hammers are an effective means for creating a force, but when it comes to removing bearings, a common barrier is supporting the holding piece so that forces aren’t transferred elsewhere. As a related point, there are also slide hammers that thread onto special collets and effectively let you pull on something with a hammering action. however, I've found these to be less effective at creating efficient force and can be more cumbersome to use, too.
By contrast, the hammer-less bearing tools typically work on the common theme of having a receiver cup that is sized larger than the bearing being removed and which works as a lever. There is typically a plate, expanding collet, or similar that attaches to the inner race of the bearing; a threaded tool is then used to pull the collet/plate and receiver cup together – in the process removing the contained cartridge bearing that sits between. This tool style can be a dream to use, but there are caveats.

Firstly, these bearing pullers need a flat surface around the outside of the bearing to leverage against. Sometimes, there won’t be adequate material thickness around the bearing; other times, the surface isn’t flat and, therefore, would force the tool out of alignment to the bearing (a common problem found with some rear suspension pivots). In these circumstances, you’re often back to using a hammer-based tool for removal.
These puller-type tools also need a way to attach to the bearing, and sometimes internal preload spacers or poor clearance can prevent that. I’ll repeat this a few times, but there is no silver-bullet tool for all bearing removal situations.
Five types of cartridge bearing removal scenarios
Contained axle
Commonly found on rear hubs (such as DT Swiss), a contained axle (or over-axle bearing configuration) refers to a design that uses a shouldered axle that is sandwiched between a pair of cartridge bearings. In this scenario, hitting one side of the axle with a non-marring hammer would drift out the bearing at the opposite end. You’d then put the axle back in to drift out the second bearing (assuming it’s not blocked by a snap-ring, lockring or drive ring!).

This style of bearing configuration is the easiest to remove, although care must be taken to ensure you don’t damage the often thin and soft aluminium axle ends. Here, my method includes protecting the axle end with a small tool, such as that provided in DT Swiss’ hub service kits or an aftermarket version sold by BSC Tools (UK-based). Alternatively, if you have a 3D printer, you can print one.
Did we do a good job with this story?